How To Make The Best Catalina Chicken Recipe At Home
The first time I tasted Catalina Chicken was at a neighborhood potluck five years ago. I remember taking that initial bite—the perfect balance of tangy sweetness coating tender, juicy chicken—and immediately hunting down the person who brought it. “What is this magic?” I asked, already planning how I could recreate it at home. When they told me how simple it was to make, I couldn’t believe it. Just a few ingredients transformed ordinary chicken into something extraordinary.
That’s the beauty of Catalina Chicken—it delivers impressive flavor with minimal effort. Over the years, I’ve perfected my own Catalina Chicken Recipe, testing countless variations to bring you the absolute best version. This dish has become my go-to for busy weeknights, potlucks, and dinner parties because it never fails to impress while allowing me to spend less time in the kitchen and more time with my guests.
In this post, I’m sharing my tried-and-true Baked Catalina Chicken Recipe that strikes the perfect balance between simplicity and flavor. Whether you’re a seasoned cook or just beginning your culinary journey, this Easy Catalina Chicken Recipe will earn a permanent spot in your dinner rotation.
What is Catalina Chicken recipe ?
Catalina Chicken is a beloved American dish that gained popularity in the 1970s and 1980s during the height of convenience cooking. The star of this recipe is Catalina dressing—a vibrant red-orange, sweet-tangy French-style dressing that transforms ordinary chicken into something special.
The origins of Catalina dressing itself are somewhat mysterious, but it was popularized by Kraft Foods and named after Santa Catalina Island off the coast of California. The dressing’s bold color and sweet-tangy profile made it perfect for creating quick, flavorful meals during an era when convenience foods were revolutionizing American kitchens.
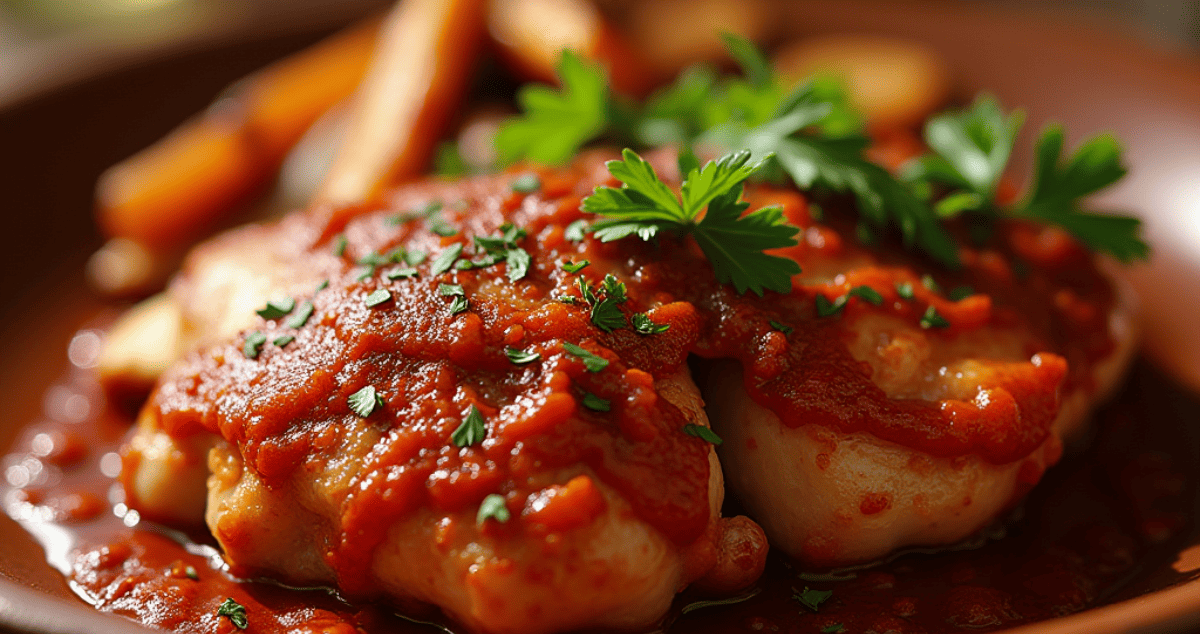
Traditional Catalina Chicken recipe combines the signature dressing with onion soup mix and preserves (typically apricot or peach) to create a sauce that’s the perfect blend of sweet, tangy, savory, and slightly spicy. When baked with chicken, the sauce caramelizes beautifully, creating a glaze that’s simply irresistible.
While the most common preparation is baked Catalina Chicken, you can also prepare it in a skillet, slow cooker, or even on the grill. Each method brings out different nuances in the flavor profile, but all deliver that distinctive sweet-tangy taste that makes this dish so popular.
Why This Catalina Chicken Recipe is the BEST!
After testing dozens of variations, I’m confident this Catalina Chicken Recipe stands head and shoulders above the rest. Here’s why:
Perfectly Balanced Flavor: I’ve fine-tuned the ratio of Catalina dressing to other ingredients for the ideal sweet-tangy balance that enhances—rather than overwhelms—the chicken.
Foolproof Method: Even if you’ve never cooked before, you can make this dish successfully. The clear, simple steps eliminate guesswork and guarantee delicious results every time.
Everyday Ingredients: No hunting for obscure items—everything you need is available at any grocery store, and you might already have most ingredients in your pantry.
Versatility: This recipe works with any chicken parts you prefer—breasts, thighs, drumsticks, or a combination—and can be easily adapted for different dietary needs.
Make-Ahead Friendly: You can prep this dish in advance, making it perfect for busy weeknights or stress-free entertaining.
Family-Tested & Approved: This recipe has been taste-tested by picky eaters of all ages and consistently receives rave reviews.
Minimal Cleanup: The one-dish preparation means less time washing dishes and more time enjoying your meal.
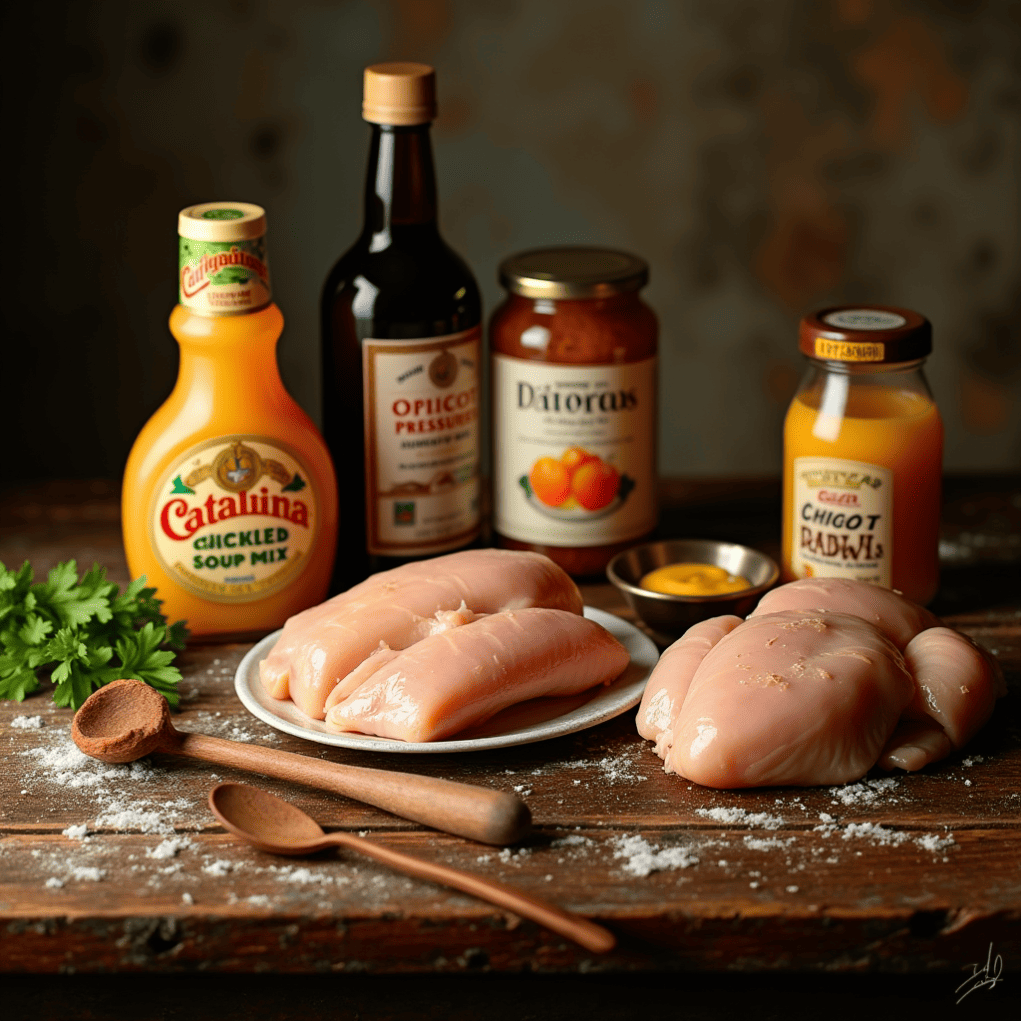
Ingredients
For the Chicken:
- 3 pounds chicken pieces (bone-in, skin-on thighs and drumsticks work best) (1.4 kg)
- 1 teaspoon salt (5 g)
- ½ teaspoon black pepper (2.5 g)
For the Sauce:
- 1 bottle (16 oz/450 g) Catalina dressing
- 1 packet (1 oz/28 g) dry onion soup mix
- ½ cup apricot preserves (160 g)
- 2 tablespoons soy sauce (30 ml)
- 2 cloves garlic, minced (about 2 teaspoons/10 g)
- 1 tablespoon Dijon mustard (15 g)
- ¼ teaspoon red pepper flakes (optional, for heat) (1.25 g)
For Garnish (Optional):
- 2 green onions, thinly sliced
- 1 tablespoon fresh parsley, chopped
- 1 tablespoon sesame seeds, toasted
Ingredient Notes & Substitutions:
- Chicken: While bone-in, skin-on pieces provide the most flavor and moisture, boneless skinless chicken breasts or thighs work well too. Just reduce the cooking time by about 10-15 minutes.
- Catalina Dressing: Store-bought works perfectly (I recommend Kraft or Wishbone), but you can make your own (see FAQ below).
- Onion Soup Mix: Lipton or store brands both work well. For a lower-sodium option, use only half the packet.
- Preserves: Apricot provides the traditional flavor, but peach, orange marmalade, or pineapple preserves make excellent substitutions.
- Soy Sauce: Use low-sodium soy sauce to control salt content. For gluten-free diets, substitute tamari or coconut aminos.
- Dijon Mustard: Adds depth and tanginess. Yellow mustard will work in a pinch but has a stronger flavor.
Equipment Needed
- 9×13 inch baking dish (glass or ceramic preferred)
- Mixing bowl (medium-sized)
- Whisk
- Measuring cups and spoons
- Meat thermometer
- Aluminum foil
- Basting brush (optional)
- Tongs for handling chicken
Step-by-Step Instructions
Preparation:
- Preheat your oven to 375°F (190°C).
- Pat the chicken pieces dry with paper towels. Season evenly with salt and pepper on all sides.
- Arrange the chicken pieces in a single layer in your baking dish, skin side up.
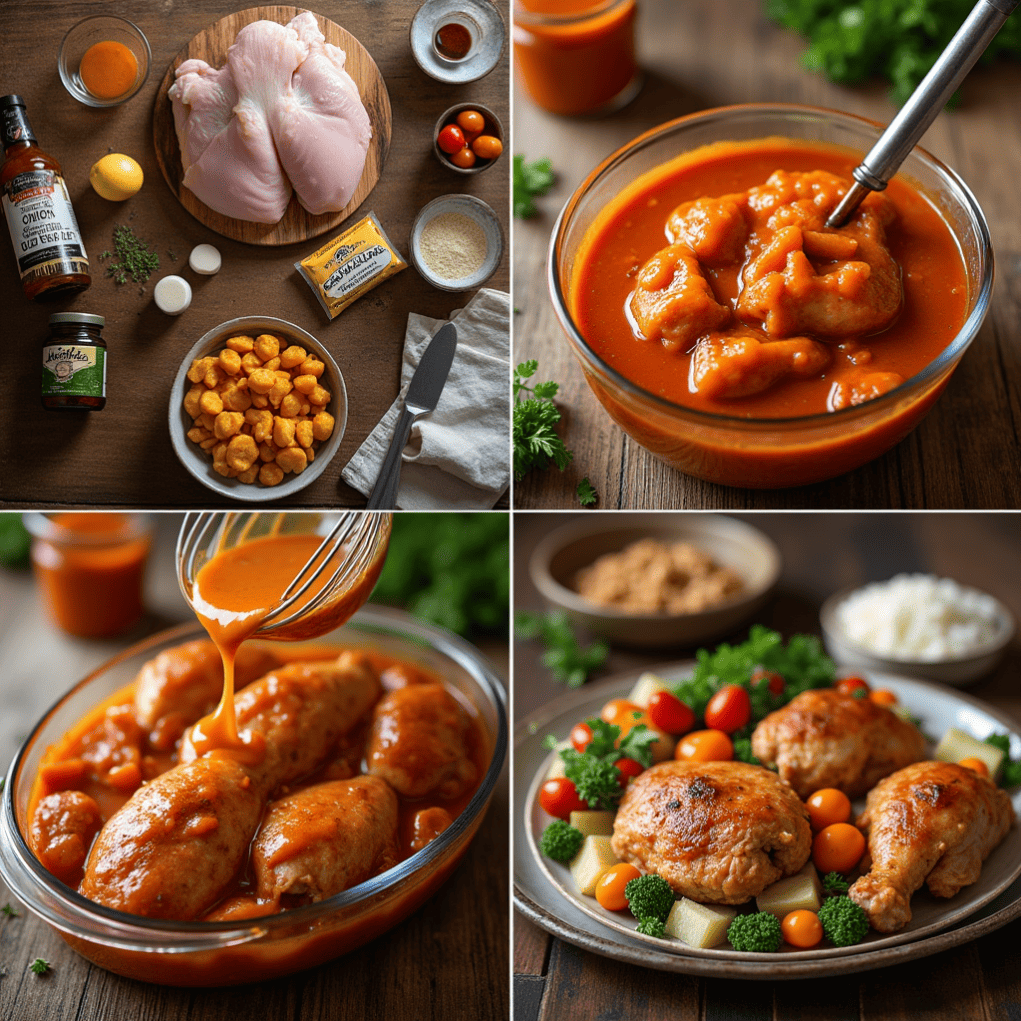
Making the Sauce:
- Combine the Catalina dressing, onion soup mix, apricot preserves, soy sauce, minced garlic, Dijon mustard, and red pepper flakes (if using) in a mixing bowl.
- Whisk thoroughly until all ingredients are well incorporated and the preserves are fully dissolved into the mixture.
Baking:
- Pour approximately ⅔ of the sauce over the chicken pieces, ensuring they’re well coated. Reserve the remaining sauce for later.
- Cover the baking dish with aluminum foil and bake for 30 minutes.
- Remove the foil, baste the chicken with the sauce from the pan, and pour the remaining sauce over the chicken.
- Return to the oven, uncovered, and bake for an additional 25-30 minutes until the chicken is fully cooked (internal temperature of 165°F/74°C) and the sauce has caramelized.
- Optional: For extra caramelization, broil on high for the final 2-3 minutes, watching carefully to prevent burning.
- Rest the chicken for 5-10 minutes before serving, allowing the juices to redistribute throughout the meat.
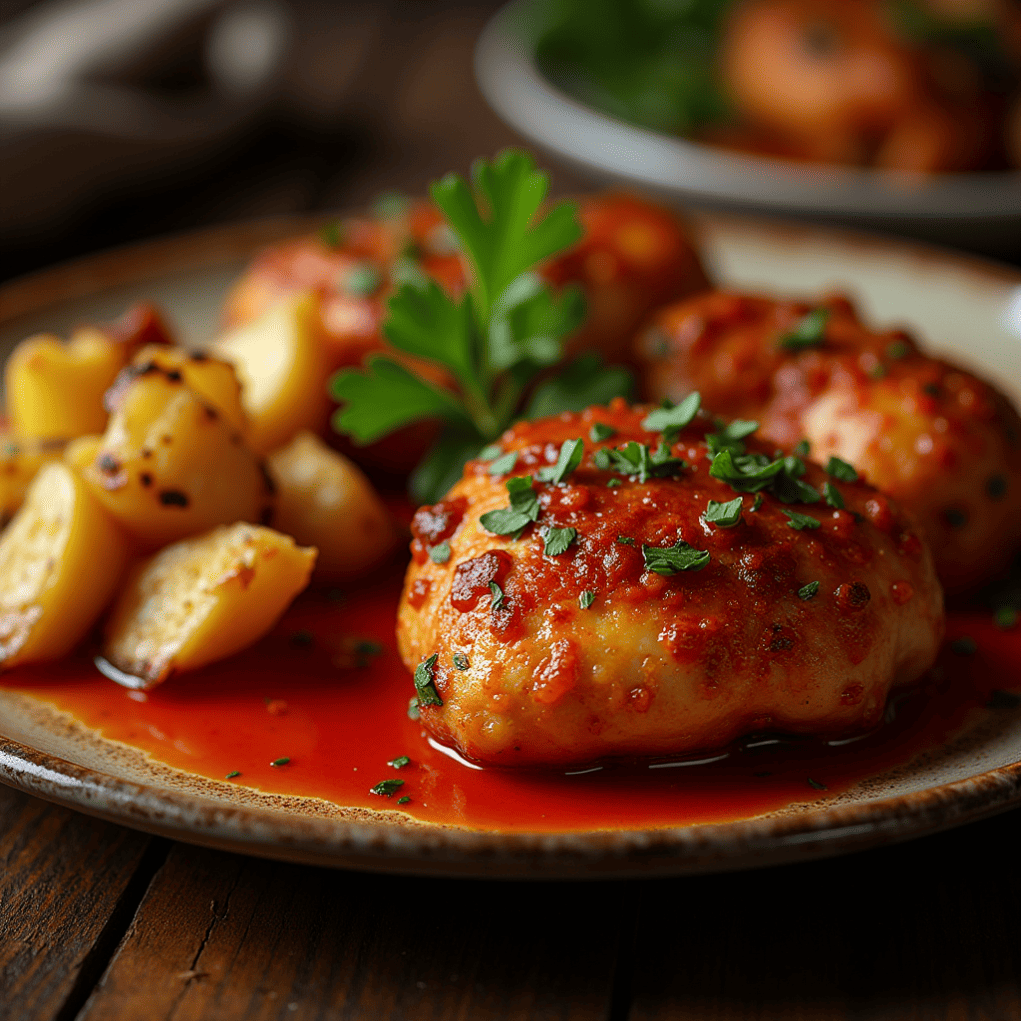
- Garnish with sliced green onions, chopped parsley, and/or toasted sesame seeds before serving.
Tips & Tricks for Perfect Catalina Chicken
For Maximum Flavor:
- Marinate if Time Permits: For even more flavorful chicken, combine the sauce and chicken in a ziplock bag and refrigerate for 2-4 hours before baking.
- Don’t Skip the Basting: Basting halfway through cooking ensures the chicken remains moist and absorbs maximum flavor.
- Balance is Key: If you find the sauce too sweet, add an extra tablespoon of soy sauce or a teaspoon of apple cider vinegar to increase tanginess.
Texture Tips:
- For Crispy Skin: Pat chicken extremely dry before seasoning and make sure pieces aren’t touching in the baking dish.
- For Thicker Sauce: If you prefer a thicker glaze, remove chicken when done and transfer sauce to a small saucepan. Simmer for 5-7 minutes until reduced, then pour over chicken.
- For Extra Saucy Chicken: Double the sauce recipe if you like having additional sauce for serving over sides.
Troubleshooting:
- If Sauce Burns: Your oven may run hot. Next time, reduce temperature by 25°F and cover with foil for longer.
- If Chicken Isn’t Browning: Make sure you remove the foil for the second half of cooking. If still not browning, brush with a mixture of 1 tablespoon honey and 1 tablespoon sauce before the final cooking phase.
- If Chicken Is Dry: Likely overcooked. Use a meat thermometer and remove chicken as soon as it reaches 165°F.
Make-Ahead Tips:
- Prepare the sauce up to 3 days in advance and store in an airtight container in the refrigerator.
- Assemble the entire dish up to 24 hours ahead, cover and refrigerate, then add 5-10 minutes to the covered baking time.
Variations & Customizations
Dietary Adaptations:
Gluten-Free Catalina Chicken:
- Use gluten-free Catalina dressing (check labels carefully)
- Replace onion soup mix with 2 tablespoons dried minced onion, 1 teaspoon garlic powder, 1 teaspoon dried parsley, and ½ teaspoon salt
- Substitute tamari or coconut aminos for soy sauce
Keto-Friendly Catalina Chicken:
- Use sugar-free Catalina dressing (Walden Farms makes one)
- Replace apricot preserves with 2 tablespoons sugar-free maple syrup and ¼ teaspoon apricot extract
- Skip the onion soup mix and use 1 tablespoon dried onion flakes, 1 teaspoon garlic powder, and ½ teaspoon each salt and pepper
Healthy Catalina Chicken (Reduced Sugar/Sodium):
- Use ½ cup Catalina dressing mixed with ½ cup plain Greek yogurt
- Use only half the onion soup packet
- Replace half the preserves with unsweetened applesauce
- Use low-sodium soy sauce
Flavor Variations:
Spicy Catalina Chicken:
- Add 1-2 tablespoons sriracha or 1 teaspoon cayenne pepper to the sauce
- Include 1 diced jalapeño with seeds for extra heat
- Garnish with red pepper flakes
Catalina Chicken with Pineapple:
- Add 1 cup fresh pineapple chunks to the baking dish
- Replace apricot preserves with pineapple preserves
- Add 2 tablespoons pineapple juice to the sauce
Catalina Chicken with Vegetables:
- Add 1 sliced bell pepper, 1 sliced onion, and 2 cups broccoli florets to the baking dish
- Increase sauce by 25% to coat vegetables
- Extend cooking time by 5-10 minutes
Honey-Lime Catalina Chicken:
- Add 2 tablespoons honey and the zest and juice of 1 lime to the sauce
- Add 1 teaspoon ground cumin for a southwestern flair
- Garnish with fresh cilantro instead of parsley
Serving Suggestions
Perfect Pairings:
Starches:
- Fluffy White Rice: The perfect canvas for soaking up the delicious sauce
- Buttered Egg Noodles: A comforting companion to the tangy chicken
- Creamy Mashed Potatoes: Create a delicious contrast of textures
- Crusty French Bread: Ideal for mopping up every last bit of sauce
Vegetables:
- Steamed Broccoli: The mild flavor balances the bold sauce perfectly
- Honey-Glazed Carrots: Complement the sweet notes in the chicken
- Simple Green Salad: The freshness cuts through the richness of the dish
- Roasted Brussels Sprouts: Their slight bitterness balances the sweet sauce
Plating Tips:
- Family Style: Place the chicken on a large platter surrounded by the sauce, garnished with herbs for a beautiful presentation
- Individual Plates: Serve one piece of chicken atop a mound of rice, drizzle with extra sauce, and add a colorful vegetable for contrast
- For Guests: Pre-portion chicken and remove bones before serving for an elegant presentation
Beverage Pairings:
- Wine: A slightly sweet Riesling or fruity Pinot Noir complements the sweet-tangy sauce
- Beer: A wheat beer or amber ale balances the dish nicely
- Non-Alcoholic: Unsweetened iced tea with lemon or a tart lemonade provides refreshing contrast
Storage & Reheating Instructions
Proper Storage:
- Refrigeration: Store leftover Catalina Chicken in an airtight container for up to 4 days.
- Freezing: Freeze in freezer-safe containers or heavy-duty freezer bags for up to 3 months. For best results, freeze the chicken and sauce separately.
- Preparation for Freezing: Cool completely before transferring to storage containers. Label with date and contents.
Reheating Methods:
Oven (Best Method):
- Preheat oven to 325°F (165°C)
- Place chicken and sauce in an oven-safe dish and cover with foil
- Heat for 15-20 minutes until internal temperature reaches 165°F (74°C)
- Uncover for the last 5 minutes if you want to re-crisp the skin
Microwave (Quickest Method):
- Place chicken and sauce in a microwave-safe dish
- Cover with a damp paper towel to preserve moisture
- Heat on 70% power for 2-3 minutes, checking halfway through
- Let stand for 1 minute before serving
Stovetop (For Sauce Only):
- If you have leftover sauce without chicken, it can be reheated in a small saucepan over medium-low heat
- Stir occasionally until heated through, about 3-5 minutes
- Use as a glaze for freshly cooked chicken or other proteins
Making Ahead:
- Partially Bake Option: For the freshest taste, bake chicken for only 25 minutes, then refrigerate. Complete the remaining baking time plus an extra 5-10 minutes when ready to serve.
- Sauce Only: Prepare sauce up to 5 days ahead and store separately from raw chicken.
Nutritional Information
Note: The following nutritional information is an estimate based on using skin-on, bone-in chicken thighs. Values will vary based on specific ingredients used and exact portion sizes.
Per Serving (1 chicken thigh with sauce):
- Calories: 425
- Total Fat: 24g
- Saturated Fat: 6g
- Cholesterol: 115mg
- Sodium: 920mg
- Total Carbohydrates: 25g
- Dietary Fiber: 0g
- Sugars: 22g
- Protein: 28g
Disclaimer: Nutritional information is calculated using third-party tools and should be considered an estimate. For the most accurate information, calculate based on the specific ingredients and amounts you use.
Frequently Asked Questions
1. Can I use a different type of chicken?
Absolutely! While bone-in, skin-on pieces yield the juiciest results, you can use boneless skinless chicken breasts or thighs. Just reduce the cooking time by about 10-15 minutes and check for doneness with a meat thermometer (165°F/74°C internal temperature). Chicken tenders work well too—reduce cooking time to about 20-25 minutes total.
2. Can I make this recipe ahead of time?
Yes! You have several options:
- Prepare just the sauce up to 5 days ahead and store in the refrigerator
- Combine sauce and raw chicken up to 24 hours before cooking (great for marinating)
- Fully cook the dish, refrigerate for up to 4 days, and reheat following the instructions above
3. Is Catalina dressing gluten-free?
Most commercial Catalina dressings contain wheat-derived ingredients, so they’re not gluten-free. However, some brands offer gluten-free versions—always check the label. Alternatively, you can make your own gluten-free Catalina dressing (see question #7).
4. How long does Catalina Chicken last in the fridge?
Properly stored in an airtight container, leftover Catalina Chicken will last 3-4 days in the refrigerator. For food safety, always reheat to an internal temperature of 165°F (74°C).
5. Can I freeze Catalina Chicken?
Yes, Catalina Chicken freezes well for up to 3 months. For best results, freeze the chicken and sauce separately. Thaw overnight in the refrigerator before reheating according to the instructions above.
6. Can I grill Catalina Chicken?
Absolutely! For grilled Catalina Chicken:
- Marinate chicken in 1/2 the sauce mixture for 2-4 hours
- Preheat grill to medium heat (350-400°F)
- Grill chicken for 6-8 minutes per side, or until internal temperature reaches 165°F
- During the last 2-3 minutes, brush with additional sauce
- Reserve remaining sauce and heat in a small saucepan until bubbling to serve alongside
7. Can I make my own Catalina dressing?
Yes! Here’s a quick homemade Catalina dressing recipe:
- 1/2 cup ketchup
- 1/2 cup sugar (or 1/4 cup honey)
- 1/4 cup apple cider vinegar
- 1/4 cup oil (vegetable or canola)
- 2 tablespoons grated onion
- 1 teaspoon Worcestershire sauce
- 1/2 teaspoon paprika
- 1/4 teaspoon garlic powder
- 1/4 teaspoon salt
- 1/8 teaspoon pepper
Whisk all ingredients together until well combined. Use immediately or store in the refrigerator for up to 2 weeks.
8. Can I make this in a slow cooker?
Yes! For slow cooker Catalina Chicken:
- Place chicken in slow cooker
- Mix sauce ingredients together and pour over chicken
- Cook on LOW for 6-7 hours or HIGH for 3-4 hours
- For thicker sauce, transfer liquid to saucepan after cooking and simmer until reduced
9. My sauce is too thin. How can I thicken it?
If your sauce is thinner than desired:
- Remove chicken to a serving platter and cover to keep warm
- Pour sauce into a saucepan
- Mix 1 tablespoon cornstarch with 1 tablespoon cold water
- Stir cornstarch mixture into sauce and simmer for 3-5 minutes until thickened
- Pour thickened sauce over chicken
10. Can I use homemade preserves instead of store-bought?
Absolutely! Homemade preserves often have a fresher flavor. Just ensure they’re smooth (or strain them) for the best sauce consistency.
Conclusion
There’s a reason Catalina Chicken has stood the test of time—it’s the perfect combination of convenience and flavor that fits into our busy lives while still delivering a meal worth getting excited about. The vibrant, tangy-sweet sauce transforms ordinary chicken into something special, and the fact that it requires minimal prep time makes it all the more appealing.
This Baked Catalina Chicken Recipe has been a staple in my kitchen for years, adapting to countless family gatherings, potlucks, and weeknight dinners. Its versatility means it can be customized to suit any palate or dietary need, and its reliability means it turns out delicious every single time.
I hope this Easy Catalina Chicken Recipe brings the same joy to your table that it has to mine. Whether you follow it exactly or put your own spin on it, the combination of sweet, tangy Catalina dressing with juicy chicken is sure to become a favorite.
What’s your favorite side dish to serve with Catalina Chicken? Let me know in the comments below! And if you’re looking for more simple yet flavorful chicken recipes, check out my Honey Garlic Chicken or One-Pan Lemon Herb Chicken.
Happy cooking!
Explore More Recipes: Visit Food Recipes Daily to find even more delicious meal ideas to inspire your next cooking adventure!
Did you make this recipe?
Mention @Food_RecipesDaily or tag #foodrecipesdaily!